Wednesday 28 November 2012

Makeup Tutorial: Sprite


One of the aspects of makeup I've always loved is being able to transform your face into just about anything you want to be. So far on this blog, I've mainly stuck to safe tutorials that you can wear out, so I decided to go back to what I enjoy doing and do a full face tutorial. 

This look can still be wearable (maybe lose the green eyebrows, green contouring and bucket-loads of highlighter) but I've taken it a bit further here just for fun. I wasn't sure what to call it, but it's essentially a green cut crease with red lips and a bit of contouring, which reminded me of a wood-nymph/pixie/elf-like creature. Enjoy.

First things first, I applied my foundation (Rimmel's Match Perfection), Revlon's cream blush in Pinched, and the highlighter from 17's Glow shimmer brick to my cheek bones. I added a lot of highlighter, which I kept going back and adding to throughout the tutorial, because I wanted the feel of very prominent, high cheekbones. I didn't want my face to look strictly "human" so the more light I could draw to areas of my face to make the shape appear different, the better.
As usual, I then primed my eyes using Urban Decay's Primer Potion and used the lightest, white-looking colour from Rimmel's Glam Eyes Trio Eyeshadow in 750 Tempting and packed it on to my lid quite thickly. It's hard to tell from the picture, but it isn't actually that white, it's more of a very light, lime green and worked amazingly with this look.
I then added my usual Zephyr to my brow bone and inner corner of my eyes, except for this tutorial, I didn't stop there, I carried it right down underneath my eyes, using the shimmery eyeshadow almost as a concealer.
Next is how I do my sharp, cut crease. Others may do it differently but this is just the easiest way for me. I take an eyeliner pencil (Rimmel's Soft Kohl in 031 Jungle Green, in this case) and draw along my eye socket, I do this simply by placing the pencil on the outer corner of my eye crease and applying pressure as I follow the hollow of my eye around in a semi-circle.

I then used a soft pencil brush to add a similar green onto the line and above it (apologies for the blurry image here). I used the W7 Paintbox Palette.
I then applied a slightly lighter shade of green above the crease and blended it downwards into the darker green, careful not to go over the original line and keep the 'cut' there. I then used an even lighter green to go above this and blend into the highlighter. Do this underneath the eye as well, but mirrored, so you add the darkest green next to the lash line, then a lighter green underneath that and the even lighter green underneath that.
This is probably around where the look starts to verge on the 'unwearable'. I used my pencil brush and darkest green I'd used on my eyes to contour the sides of my nose, up to the inner corner of my eyebrows. I used it to contour under my cheekbones. In the picture above, I'm just showing where to draw the contouring lines on the cheeks, I am yet to blend the green into my cheek. I then added highlighter down the middle of my nose.
Tie the eye makeup together with some black eye pencil on the waterline (Urban Decay 24/7 Glide-On Eye Pencil in Zero) and liquid/gel/pen eyeliner in black (Colorsport 24 Hour Eyeliner) on the top lash line, winging it out slightly. I also went and drew around the inner corner, bringing it to a point to make it look almost 'pixie'-like.
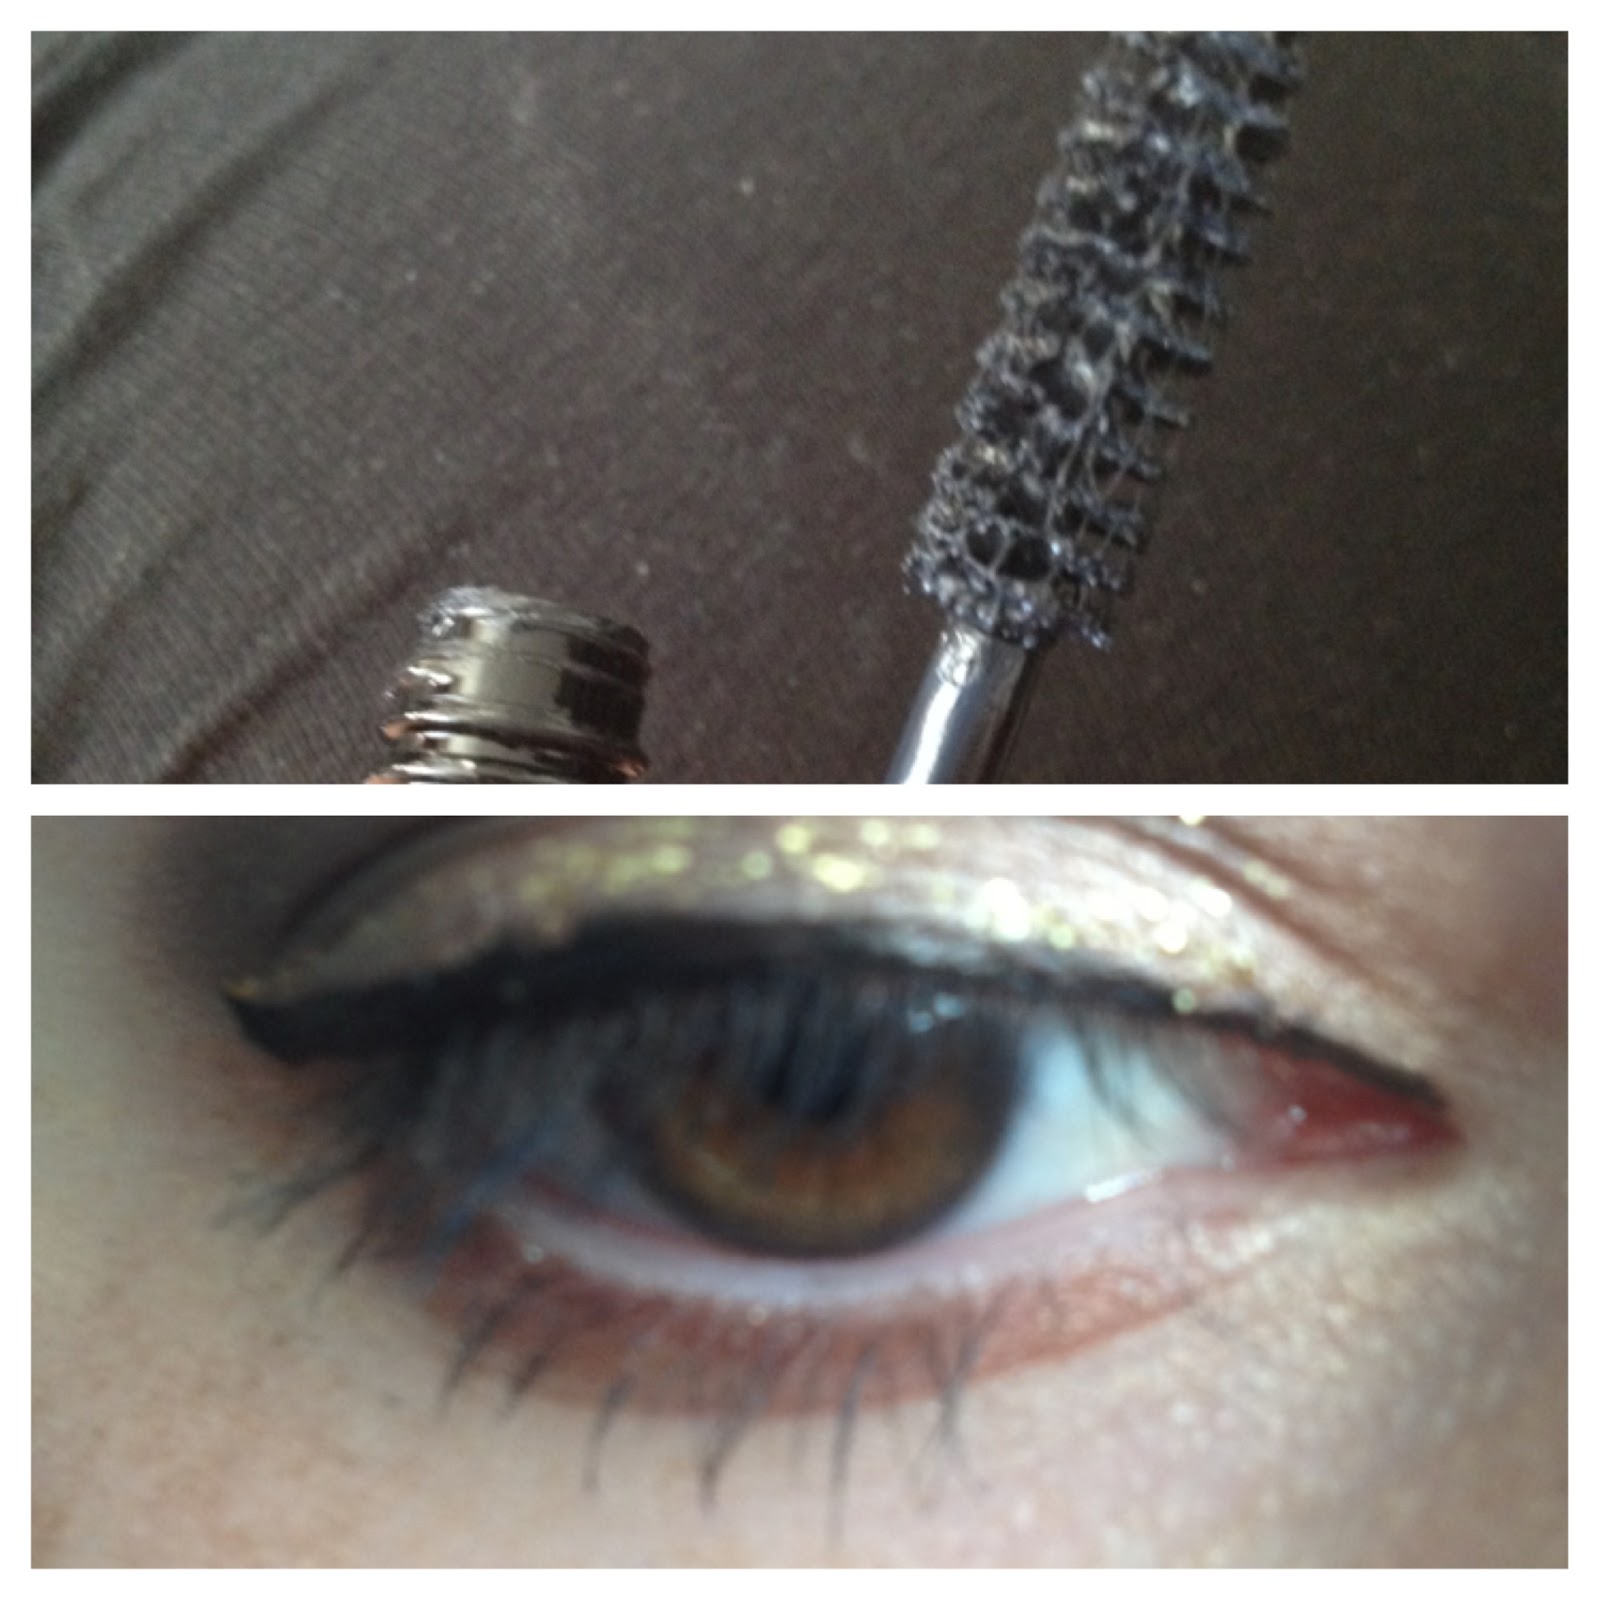
I then added black mascara (Makeover Essentials 24/7 Makeup Portfolio) to my lashes and used the darkest green in the trio (Rimmel) to fill in my eyebrows.
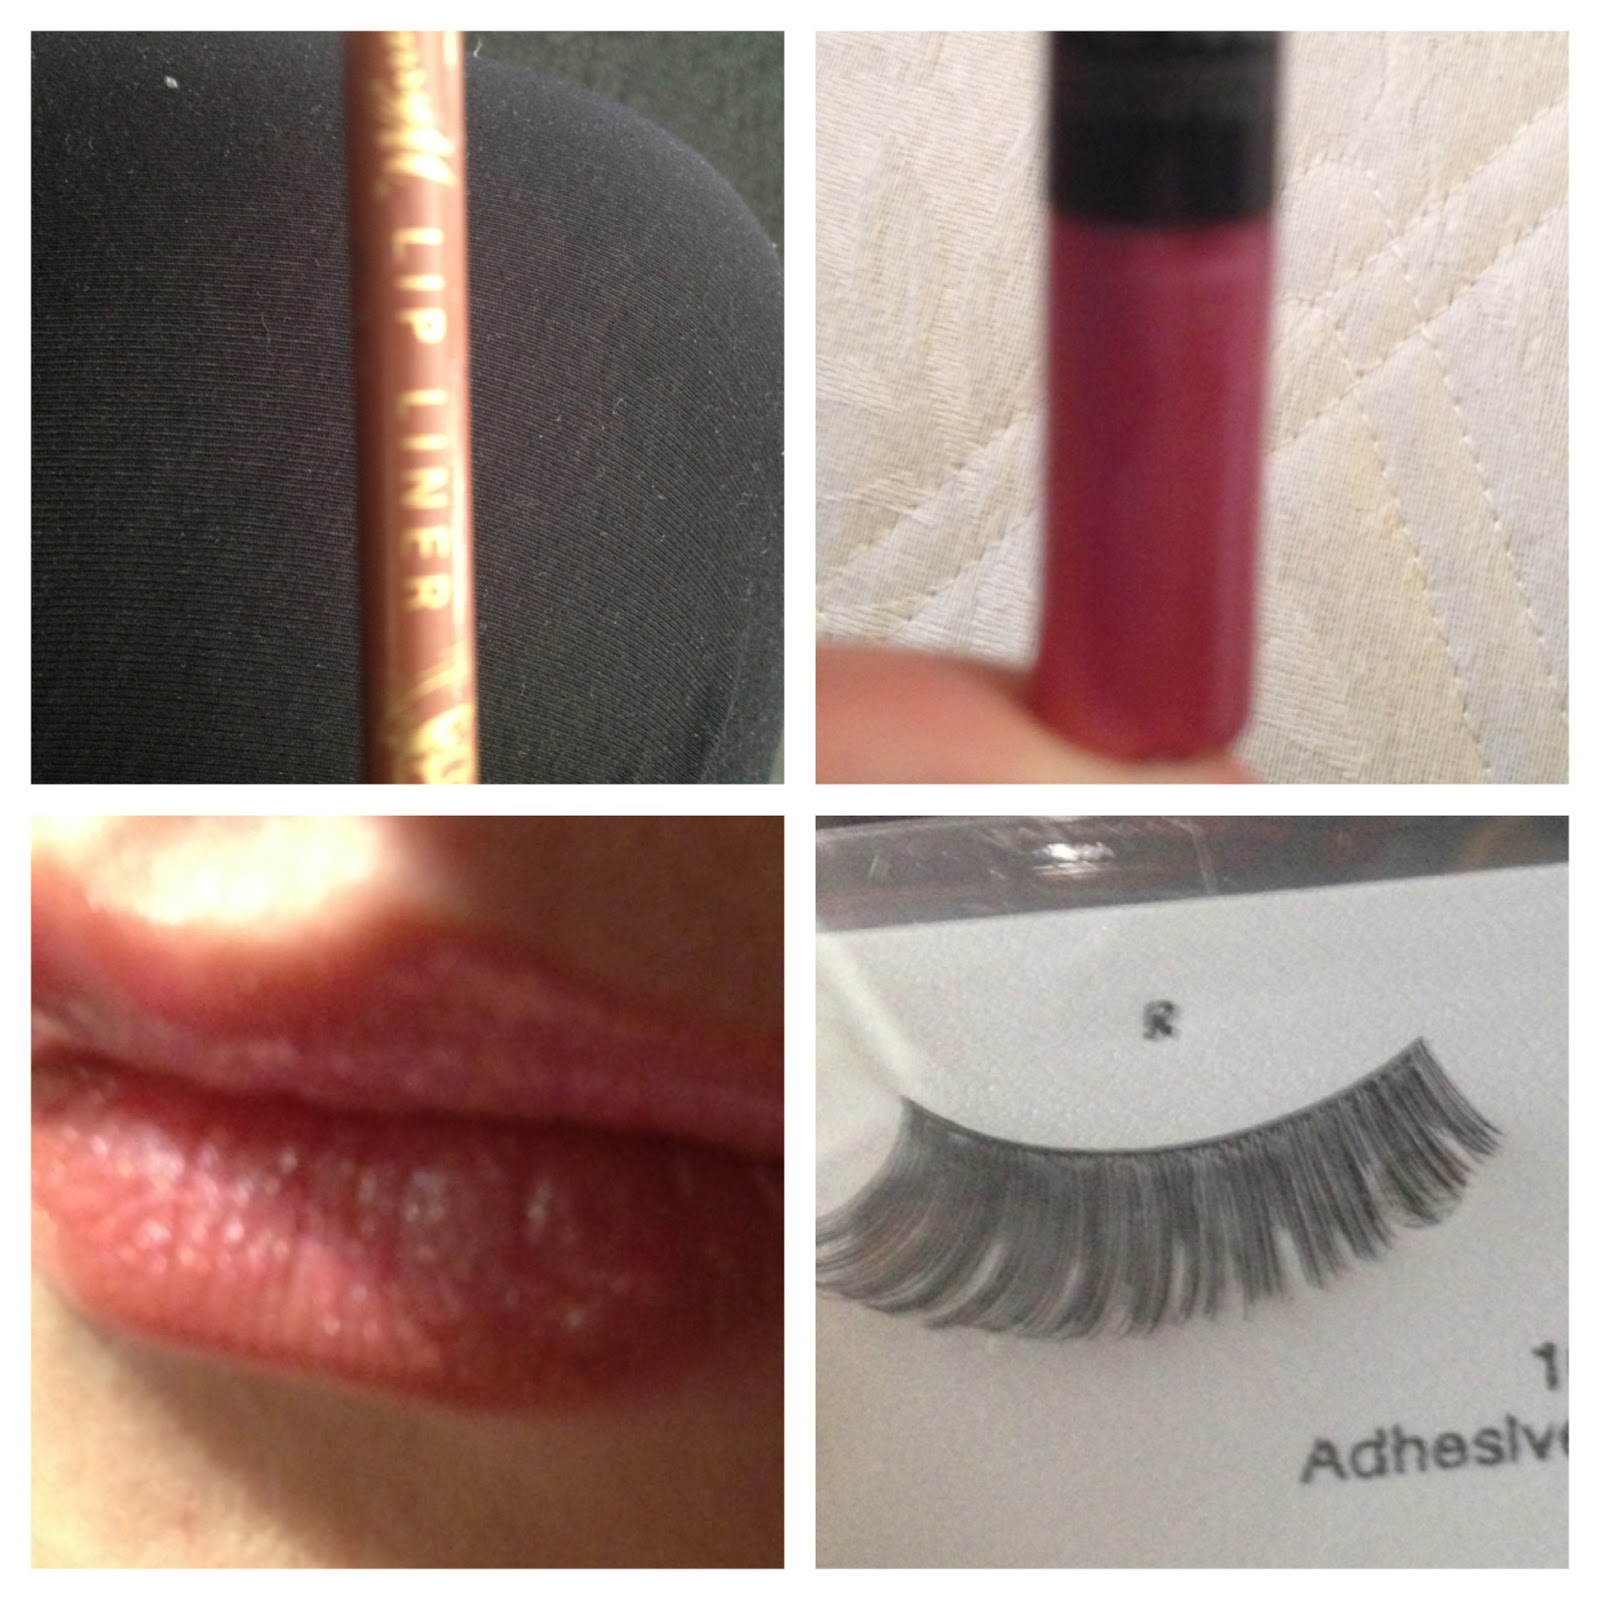
I also stuck on some winged out false eyelashes. As usual, I used Eylure's Naturalites Evening Wear Ultra Glam.
To contrast the green, I decided to go with a bright red lip. I used Barry M Kohl Pencil in 25 to line and fill in my lips, with a bright red gloss from Makeover Essentials over the top to add the shine.


Monday 26 November 2012

OPI: James Bond Collection: The Spy Who Loved Me (£8.25/15ml)

The Spy Who Loved Me came as part of OPI's 'Bondette' Collection and at first I was skeptical as I'm not the biggest fan of bright red nails. I am glad to say though, I was pleasantly surprised and this particular red as wormed its fiery way into my heart.
The Spy Who Loved Me is a deep, sexy red with a hint of sparkle under the surface that becomes more obvious under the light. It's tremendously luxurious and perfect for the festive period. I find myself looking at the picture above and realising that even this close-up doesn't do the colour any justice; it makes it look flat, one-dimensional and garish, but trust me when I say this candy-cane red is simply perfect and I adore it.

OPI: James Bond Collection: Goldeneye (£8.50/15ml)

I have a complete obsession with everything gold right now. Any and all forms of gold. So when I saw OPI's Goldeneye from their James Bond Collection, I went all goo-goo eyed and decided that my life depended on getting it. I've been slowly making my way through the entire collection and found them a little hit (Moonraker) and miss (The Living Daylights) but I was sure I'd love this one and, sure enough, I was thrilled.


Now, if the bottle looks a bit small here, that's because it is. I bought Goldeneye as part of the 'Bondette' Collection, which includes four mini-bottles (3.75ml each) of Goldeneye, The Spy Who Loved Me, The World Is Not Enough and Live and Let Die. This little box is a great idea, as I don't think I've ever finished a whole 15ml bottle of nail polish before and for the price of just one regular colour, I can get four. It's especially good for Christmas as the colours are glittery and festive, as well as good quality.


Goldeneye goes on smoothly and the colour is amazing. It's a strong yellow-gold with fine, but noticeable glitter and although it took me around 4 coats to get to the colour in the picture, it was well worth it as I'm completely in love with it. As ever with OPI nail lacquers, it's pretty hard to chip; I've been wearing it for over 4 days now and they still look just as good as they did after one day. I'd definitely recommend this, especially for the festive period.

Rimmel London: Match Perfection Foundation (£6.99/30ml)

As the nights get longer and days darker, as with most people, my skin has turned even paler than usual and I've been on the hunt for a new, affordable foundation for the Winter months. I stumbled across a sample of Rimmel London's Match Perfection Light Reflecting Radiance Foundation in a well-known fashion magazine recently and had a quick swatch of the various shades, arriving at the palest of the lot: 010 Light Porcelain. This shade matched my skin tone so perfectly, I couldn't ignore it and, since I'd mainly read good things about it, I ordered some straight away.
Firstly, I love the glass bottle it comes in, it makes it feel far more 'high-end' than the price suggests, and one pump of the pump dispenser gives you exactly enough product to cover your whole face, which I found handy. The foundation itself blends into the skin effortless, with little-to-no odour and leaves a smooth, even finish. I couldn't be more pleased with the way it makes my skin look. It has medium coverage, which is my preference and brings a glowing radiance to the face, without it being too dewy.

I cannot recommend this highly enough and I will be using it on a regular basis. I'm honestly not sure how Rimmel can get away with charging so little. My only criticism, is that the shade I needed (the lightest) took a bit of searching for but the extra time is definitely worth it, if it means finding a foundation that fits your skin so effortlessly.

Sunday 25 November 2012

Makeup Tutorial: Glamourous.

This is my best friend: Becky. She's amazing and therefore volunteered to be my mannequin before we went out the other night. First and foremost, I apologise for the poor lighting in my bedroom! Secondly, I discovered that although I'm capable of applying makeup on myself, it's 10 times more difficult on another human being. However, as you can see, my beautiful friend does the makeup justice.
I called this tutorial 'Glamourous' because I wasn't really sure what else to call it. It's essentially a simple, soft cut crease that is easy to do, quick, but really pretty for a night out.
Firstly, after priming the eye, I covered the whole lid in Bootycall by Urban Decay and put Zephyr on the brow bone and in the inner corner.
I then used S&M to blend onto the outer corner and into the crease. Build this up as much as you want.
I lined the top of Becky's eyes with Colorsport's 24 Hour Eyeliner pen and waterlines with Urban Decay's 24/7 Glide-On Eye Pencil in Zero. I also used the pencil to smudge over the top of the eye pen on the top lid to not only neaten it up but to soften the effect of the harsh pen against the white on her lid.
I then used some black mascara on Becky's eyelashes (Makeover Essentials - 24/7 Makeup Portfolio) and Urban Decay's Brow Box in Brown Sugar (I used the lighter colour) to fill in her eyebrows.
I lined her lips in Barry M Lip Liner in number 5 and filled them in with a pretty, shimmery pink from Makeover Essentials, and stuck on some false eyelashes by Eylure (Evening Wear - Ultra Glam Lashes).


Makeup Tutorial: Smokey Eye


The Smokey Eye. Everyone has their own way of doing it. It's a classic that I always fall back on if I'm at a loss for what makeup to wear, especially if I'm wearing a bright colour and don't want to clash with it. It's a look that you can tailor to your mood, for example I love blending pinks, purples or greens into the crease instead of the grey I use here, to add a different element to it. But for now, here's my take on the classic Smokey Eye.
My initial tip when doing a Smokey Eye, or any dark eye makeup for that matter, is to do the eye makeup first and leave the foundation until afterwards. This stops any fallout from the makeup falling all over your freshly made up face and you having to redo it, ultimately wasting the product you've already applied. 
Firstly, I primed my eyelids all the way up to the brow bone. I can't speak highly enough of Urban Decay Primer Potion; I've been using it for a while now and love it. Primer's important with a Smokey Eye because otherwise the dark makeup has a habit of trying to creep around your face; primer keeps it in place, makes it last all night without creasing and makes the pigment in whatever eyeshadow you're using really stand out.
I patted on Blackout by Urban decay onto my eyelid up to the crease. It doesn't matter if it's not the neatest, as you'll soon find out that there's a lot of blending involved. This leads me to the next step: use a blending brush of your choice (I used a fluffy one) to blur the edges of the black eyeshadow you've applied.
 Now pick a grey eyeshadow. I chose S&M by Urban Decay, which is pretty shimmery, however you can pick a matt eyeshadow if you'd prefer. Use your fluffy blending brush to work a tiny bit of the product into your crease. It's important to only use a little at first so you can build on it, rather than using too much and feel like you have to go back and start again. To help the tones blend into each other, add a bit of the black onto the blending brush and blend that over the top of the grey into the crease.
As with most of my looks, I add a white onto the brow bone and inner corner of the eye (Zephyr - Urban Decay). Make sure you blend this into the black and grey properly. A step I haven't made very clear here is to then add the black eyeshadow under the eye and blend it out a little to add that smokey effect, I only used my ring finger to do this as I'm clumsy and have a habit of poking myself in the eye if I use a brush underneath my eye. I then lined my waterline (top and bottom) with Urban Decay's (who else?) 24/7 Glide-On Eye Pencil in Zero.
Line the top lid with black eyeliner, winging it at the outer corner (Colorsport - 24 Hour Eyeliner) and apply a black mascara (Makeover Essentials - 24/7 Makeup Portfolio) to your top and bottom lashes.
I filled in my eyebrows using Urban Decay's Brow Box in Brown Sugar using the darker of the two colours.
Then, simply stick on some false 'lashes. I tend to use thick ones for Smokey Eyes so that they stand out against the dark makeup. Eylure's Double Lashes are perfect. A tip with the bigger false eyelashes: bend them into shape before trying to apply them. They can be quite stiff and difficult to get to bend to the curvature of the eye at first, so you need to work them into shape more than thinner false lashes.

So this is my take on the classic Smokey Eye. My main pointer for this is to take your time and blend; don't rush it. The more you blend the better it looks. 

Sunday 18 November 2012

Makeup Tutorial: Autumn

 Since Autumn is almost over, I decided to mash together an Autumnal look inspired by the colours of the season. Luckily, my makeup bag is crammed full of gold and earthy tones so I had plenty to choose from and enjoyed creating it. You can improvise wherever you want but I've included the exact products I used in case you liked the look of them.


Step 1
Apply foundation (Illamasqua - LF 120).

Step 2
Contour with a deep gold bronzer and highlight cheekbones with highlighter (17 - Instant Glow Shimmer Brick).

Step 3
Apply blush (Coral Reef by Revlon) starting on the apples of your cheek and blending along your cheek bone.

Step 4
Prime eyelids all the way up to the brow bone (Urban Decay - Primer Potion) and apply a copper-brown colour. I used Chopper by Urban Decay.

Step 5
Use a light colour, such as Bootycall by Urban Decay, to highlight the brow bone, blending downwards, and to the inner corner of each eye. This makes the eyes appear bigger, wider and more awake.

Step 6
Apply a bronze to the outer corner and crease (Urban Decay - YDK).

Step 7
Blend a moss colour onto the very outer edge and crease. Cobra by Urban Decay is perfect for this.

Step 8
Apply the bronze colour under the eyes (YDK - Urban Decay) making sure you tap off any excess so that it doesn't get in your eye!

Step 9
Liner your top and bottom lash line with a dark brown eyeliner pencil (Makeover Essentials - 24/7 Makeup Portfolio), careful not to stray onto the water line. Use a white eyeliner pencil on your bottom waterline (Rimmel - 071 Pure White), this really makes your eyes look bigger.

Step 10
Use a glittery gold liquid eyeliner (Barry M - Glitter Liquid Eyeliner) over the top of the brown on your brown eyeliner pencil.

Step 11
Line the top lash line with black (Colorsport - 24 Hour Eyeliner), making sure you don't go over the gold and winging it out slightly at the end. Then use a black pencil (Urban Decay - 24/7 Glide-On Eye Pencil in Zero) on the top waterline. 

Step 12
Depending on the colour of your eyebrows, apply a darker shade on the inner corner and a lighter on the outer corner. I used Busted on the inner and YDK on the outer (both Urban Decay). Make sure to use a brow brush afterwards to make it look even and natural.

Step 13
Apply black or dark brown mascara on your top and bottom lashes (Makeover Essentials - 24/7 Makeup Portfolio).

Step 14
Put on false eyelashes. My favourite ones are Eylure Naturalites (Evening Wear). Remember to wait for the glue to go tacky before you apply them.

Step 15
Use a warm brown (Barry M - Lip Liner in 5) around the edges of your tip and blend towards to centre.

Step 16
Apply a champagne-gold lipgloss on your lips (Makeover Essentials - Lipgloss 12-Piece Set), starting in the middle and blending outwards into the lip pencil (go back over the lip liner if you need to).

And there you go.